

Prints (0)
-
No Prints Yet
Be the first to upload a Print for this Design!
Description
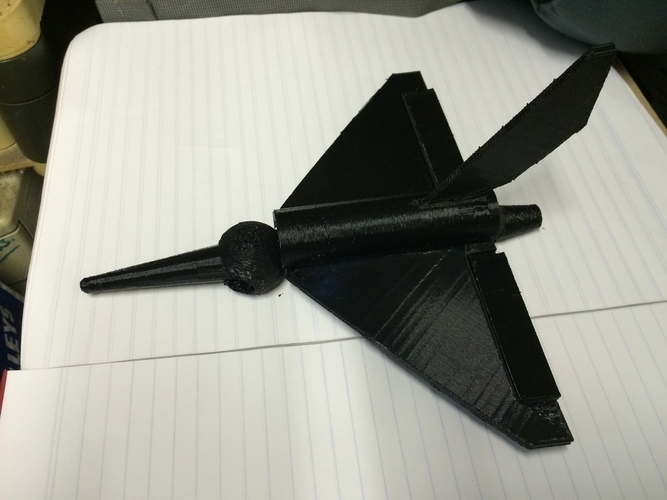
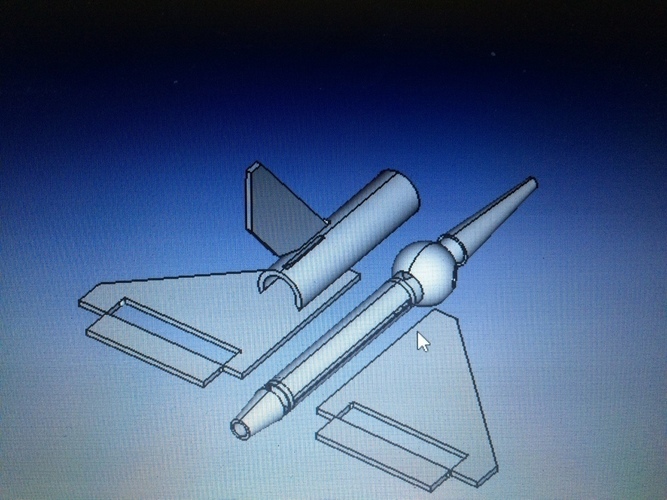
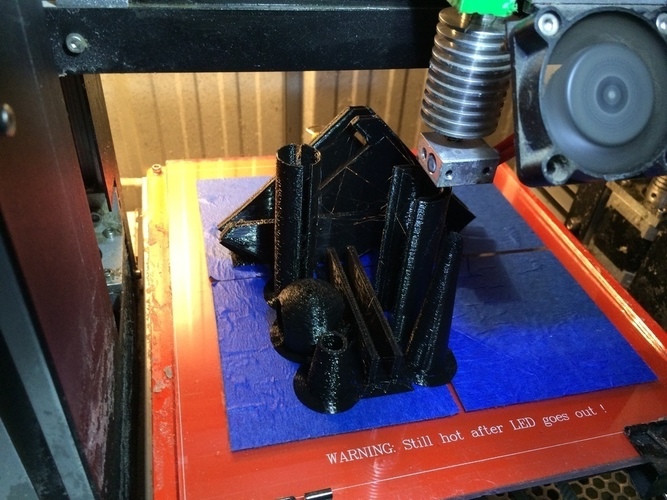
SummaryDeltDPrint SettingsPrinter: Han Bot DrtRafts: NoSupports: NoResolution: 0.2Notes: Printer Settings: Brim = 5 layers Extruder Heat = 200 Bed Heat = 65 Print Speed= 100 Infill = 0% Shell = 0.4 Top Bottom thickness = 0 How I Designed ThisFreeCad 3D ModelingThis model was designed using FreeCad. It was created using simple shapes and simple cut/union techniques that the program offers.Custom SectionProjectProject Name: Delta Rocket - RC Glider or EDF Jet Overview & Background: I designed this model as i wanted something more from the model rockets and rc planes that are currently available. i like flying rc jets/planes and i like launching model rockets. i wanted a rocket that i could send up high (100m +) and that i could fly back to earth. i wanted this model to not be limited to one use. if the model is scaled x10, it can fit a 50mm EDF inside the thrust tube. parts are made to push fit together and the optional parts required to convert to an EDF are also included. Objectives: Learning Outcomes In this project i aim to provide a walk through of how this model was created. By the end of this, you should have a clear understanding of the following techniques within FreeCad: Starting a Project Inserting Shapes Editing Shapes to create the model Bringing the Shapes together Finalizing the project Audiences: This is a project for any Hobby enthusiast. This is intended for ages 14+ when using as rocket or as RC If you choose to build as a display then age is not a problem. Parental supervision recommended when building the model. Skills Learned (Standards): The software used is FreeCad Starting a project inserting a shape hollowing a shape combining shapes model dissection model recreation finalizing a project This should provide a good understanding of how the FreeCad techniques work. Lesson/Activity: Please follow the below steps to create your own Delta Rocket - RC Glider or EDF Jet. 1- Open FreeCad 2- Create a new project 3- Let's start with the body of the model (fuselage) Insert a cylinder Change the length and diameter Hollow out the fuselage 4- Let's make the nose piece Insert a cone Change the length and radius Make the nose round insert a sphere change the size union the sphere to the nose cone hollow out the nose 5- Let's make the exhaust Insert a cone Change the length and radius hollow out the exhaust 6- Let's make the wings insert a cube change it's length, height and width turn the cube into a wing add an aileron 7- For EDF purposes, let's add some air ducts insert a sphere change dimensions hollow out the sphere insert a cone hollow out front of sphere to create air ducts 8- For EDF purposes, let's add a cable cover insert a cylinder change dimensions hollow out the cylinder and cut one side so it does not join together 9- Last part, let's make a vertical fin insert a cube change it's length, height and width turn the cube into a wing using cut technique Duration: The model took 2 hours to create. Print Duration: Model should print in 1-2 hours depending on size and quality. I printed this at 100mm/s on a 200x200mm bed. The print was scaled to 1.5. Preparation: Create a model using FreeCad: Make sure you have several hours free, a coffee and FreeCad. Printing this model: Software: Scale to the your preferred size Lay pieces so that the printer does not have difficulty printing them. the wings need to be printed on the leading edge Slice at desired speed and infill. Print with brim to be safe Printer: Level bed add adhesive Heat bed Heat nozzle Print References: http://www.thingiverse.com/thing:1585249 This guy produced an awesome FreeCad guide. I learned heaps from reading and following his guide. Thanks heaps for the lesson. Look forward to seeing more of your works...Top view of final ModelFront view of final modelFreeCad Main Page. Step 1Starting a new project. Step 2Need to make sure we have Part selected up the very top.Now we have shapes. Inserting a shape. Creating the fuselage. Step3Click on the shape you want to insert. For this project we are using a cylinder.Make changes to the shape's Radius and Height. Right click on the shape and click Fit All or Fit Selection. This makes for easy viewing of the complete model or the piece being worked on.Select the original shape from the top left, on the keyboard (ctrl+c & ctrl+v). this will create a second shape the same as the first. Select the second shape from the top left corner and change its radius to be smaller then the original shape.Select the two shapes, first the original (bigger) shape and then the new (smaller) shape, holding down the ctrl button on the keyboard. Once both items are selected, click Part on the toolbar and Boolean. In the sub menu select Cut.Now we almost have a fuselage. the two shapes we started with have now been combined into one shape called CutAdding a front part to the fuse so the nose can slide over. Do this by inserting another cylinder and changing the radius.Copy and paste the cylinder and change the second cylinders radius to be smaller. Select the two cylinders (bigger one first and smaller one second). Boolean - Cut. this will hollow out the new shape we added tot he front of the fuselage.The two parts are in place and they are both hollow.We need one of these pieces for the exhaust to slide over. Copy and paste the newly made Cut001. it will ask if you want to copy object dependencies. i normally say No.Create the copy, newly created Cut002Mov
Comments