Prints (0)
-
No Prints Yet
Be the first to upload a Print for this Design!
Description
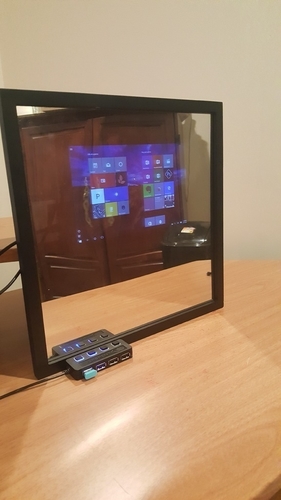
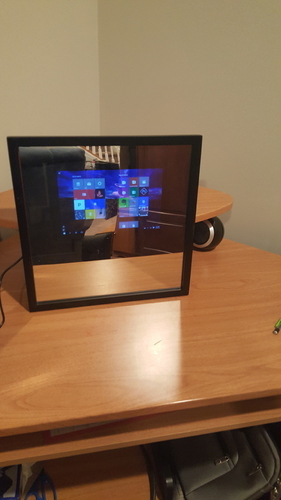
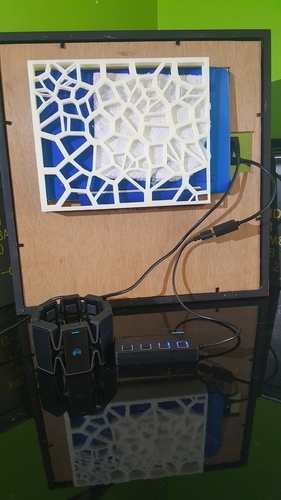
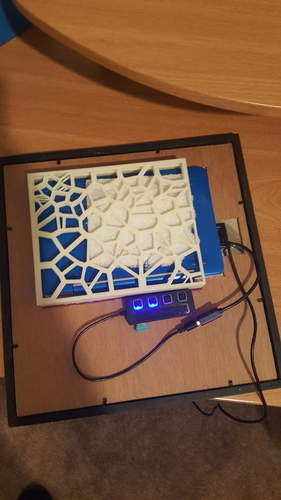
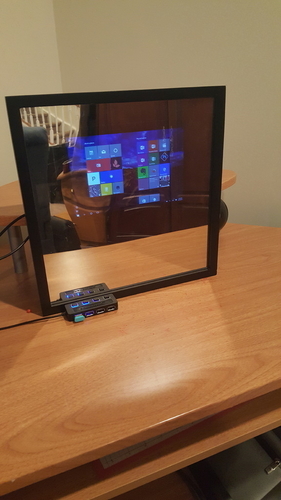
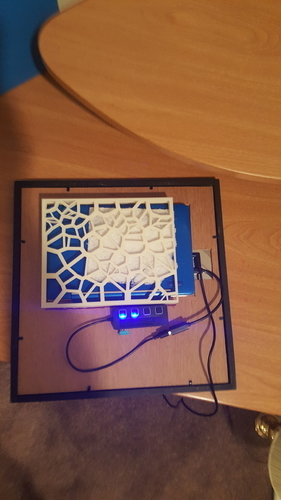
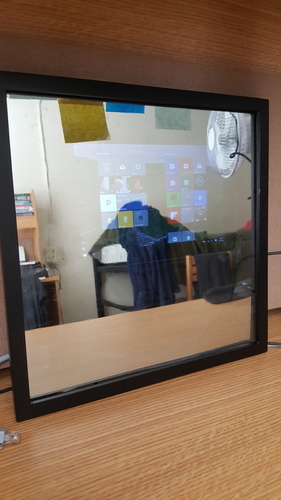
Summary The iMirror is the first gesture controlled "smart mirror." It was designed to be a universal smart mirror that works with any tablet and even a Raspberry Pi or other device. The difficulty of this project ranges from easy to difficult depending on which teaching option you choose. The iMirror is perfect for college students. Hang it on the wall or wardrobe across from your bed and you have a personal computer you can watch Netflix and browse the web with without having to get up or type on a keyboard. Steps: a. Purchase items in Bill of Materials b. Modify the cradle as needed using choice of CAD software c. Print the cradle d. Once you have the cradle, take the wood backing and cut it to fit the picture frame. Then trace the cradle onto the board and cut. e. Make sure that the tablet or display fits comfortably inside the cut. f. Place the two-way mirror in the frame followed by the wood backing. g. Use wood glue to glue the cradle to the backing. Wait a couple minutes before touching the project, even if the wood glue claims to dry in a few seconds. h. Slide the tablet or display into place. Slide foam behind it if the tablet/display if needed. i. Connect the micro-usb to usb adapter. Connect usb extention. j. Connect Myo or Kinect. k. This is the fun part! Set up the Myo and Keylemon facial recognition software. l. Now you have a fully interactive, gesture controlled smart mirror! Bill of Materials: a. two-way mirror b. tablet or LCD display with a Raspberry Pi c. plywood d. wood glue e. micro-usb to usb f. Myo, Kinect, or other gesture control device. g. Picture frame h. Keylemon or other facial recognition software (log in without using a keyboard). Find me on: How I Designed This The challenge I faced for designing this project is that I wanted to make a fully interactive smart mirror that would work with any tablet or LCD display. I ended up deciding to make a 3d printable cradle that would hold the tablet against the two-way mirror while also allowing to be easily removed. I used Autodesk Fusion 360 as my design software. The design was simple, I measure the tablet and drew a "shell" around it in Fusion. Because it was at an angle and I wanted the cradle to rest flush to the wall I extruded a triangle on top to make a rectangular cradle. Lastly, I used a voronoi sketch generator to cut holes for ventilation and ease of access. Custom Section Project: iMirror – DIY Smart Mirror Objective: By completing this project, students will learn about gesture control technology as well as create an interactive smart mirror. If you choose to have your students use a Raspberry Pi instead of a tablet, your students will gain coding skills as well as software design skills. Audiences: Students 10+ and college students. (depending on difficulty). Subjects: Engineering and computer science Skills: For students using a Raspberry Pi or other programmable device, they will need intermediate to advanced coding skills. Lesson: A) This is the easy one. The instructor should print the cradle and purchase the two-way mirror, wood and adapters. Assemble the mirror as described in the summary. Set up the gesture control and allow your students to try out the smart mirror. This option is really just a demonstration; however, I recommend that the instructor teach the students about how the gesture technology works. B) This is the intermediate one. After you have assembled the mirror and you have a Raspberry Pi. Find an open source smart mirror on the internet. Break your students up into pairs and assign a piece of code to them. Pair programming is an important topic. Allow the students to customize the programs to their liking and encourage them to incorporate gesture control into their new program. C) Lastly, the hard one. This is for advanced programmers. I encourage you to have your students break into pairs and design a mirror, one to two per pair. Each pair is responsible for writing a certain program. Once every pair has completed their programs they will distribute their programs to the other groups. From here there are two options. Students can customize the smart mirrors to their liking, or work as a class to sand off the rough edges. Duration: This project will take less than a day if you use a tablet. If you use a Raspberry Pi or other device it will take around 10 weeks depending on the coding skills of your students, or how advanced you wish to make the smart mirror. Assessment: Students will be graded on producing a deliverable. I recommend also grading them on unique features they add to their project. If you choose to make this a coding project, the grading requirements will be up to you.
Comments