Designed by
Klaus Daume
Prints (1)
Description
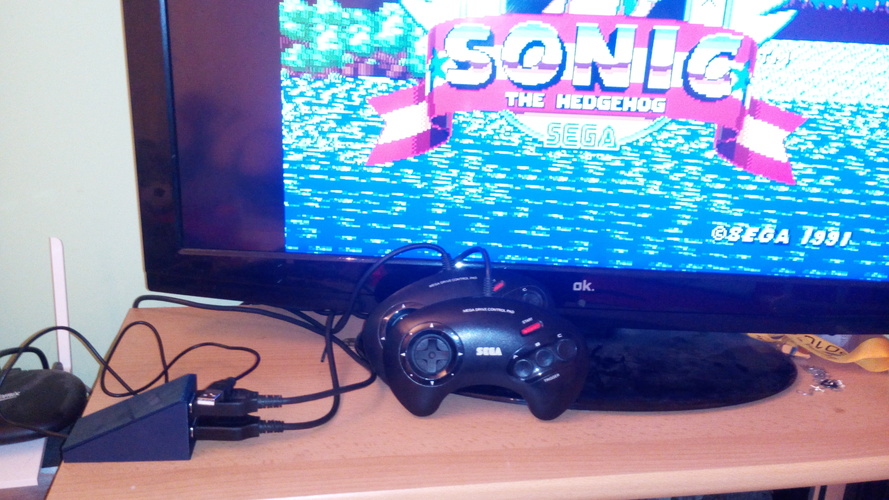
This thing is an Adapter to use your old school Sega® Megadrive Controller on any Computer/Device capable of USB Gamepads.
A special shoutout to Matthew Heironimus @ https://github.com/MHeironimus... who wrote an awesome Arduino Library to use any ATmega32u4 Arduino (and clones) as a Joystick/Gamepad device.
Bill of Materials:
- obviously a 3D printer for the case
- 16Mhz Pro Micro
- you may use the one from SparkFun: https://www.sparkfun.com/produ...
- i used a cheap chinese clone, they should fit the same space and feature the same pinout
- 2ea RS232 connectors
- may be gathered from very old desktop computers
- shown in pictures
- soldering equipment
- USB cable to fit the Pro Micro
Depending on the source you may get every electronical part for ~3,-€ at all.
Features:
- Connect 2 Megadrive Gamepads at one Computer/Android device/Set-top-box capable of using USB Gamepads
- Uses default HID drivers, no additional drivers for Windows/Mac/Linux/Android needed
- No external power supply needed
- 20ms poll rate (which is about three times as quick as Megadrive console was)
ToDo:
- Update HID Report Descriptor to show just the used buttons (36 from Adruino Joystick Library currently present)
- Add 6 Button Gamepad compatibility
- i don't own a 6 Button Sega pad myself so i can't test
- Possibly port to other processors/boards
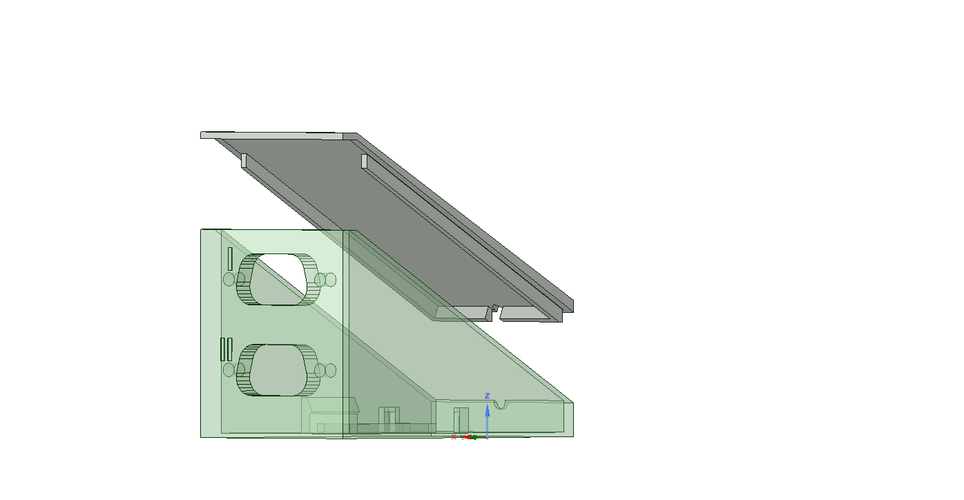
- apply some better connections between lower and upper case parts
- smoothen and shrinken the case a bid to make it look more professional (propably engravings)
- Write better documentation
- remap Arduino pins to make soldering/assembly more easy
Tutorial:
Download and install either Arduino IDE or Platform.IO .
Unfortunately i can't upload the sources to the Designfiles, so they will be included as PDF.
- Copy the sources into textfiles, named the way written in the PDF.
- Open the .ino file in the IDE of your choice.
- In case of Arduino IDE select a board from the menu which fits your board (in my case "Arduino/Genuino Micro").
- Click compile and upload.
- Your Pro Micro board should flash its LED/s as long it is being programmed.
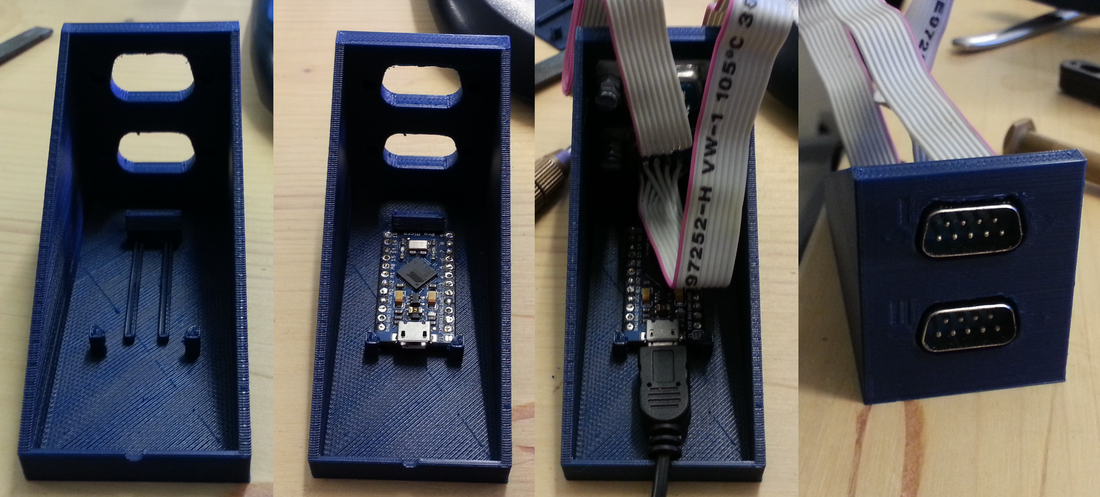
- As soon this is done, assemble the case as shown in the pictures.
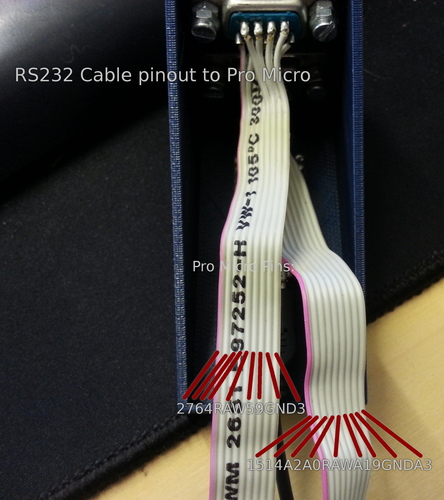
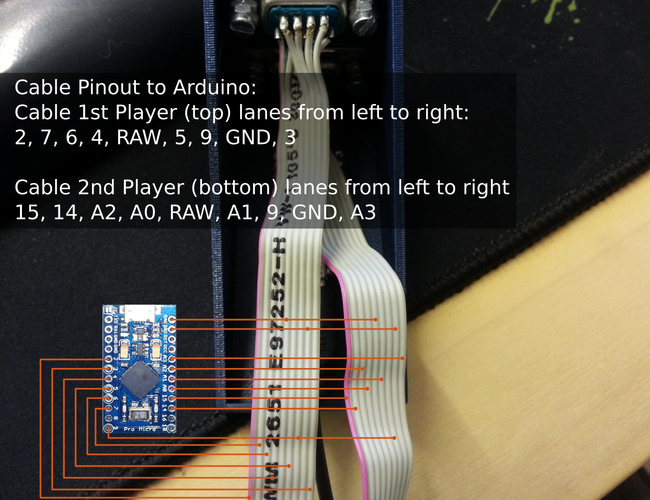
- Connect (solder) the RS232 cables to the Pro Micro as shown in the pictures.
- Setup your emulator of choice and enjoy
- You are done!
Made with Designspark Mechanical and OpenSCAD
Happy old school gaming.
Design Files
File Size
Sources.pdf
50.4 KB
Megadrive Controller Adapter-upper.stl
15.2 KB
Megadrive Controller Adapter-lower.stl
103 KB


Comments