Prints (0)
-
No Prints Yet
Be the first to upload a Print for this Design!
Description
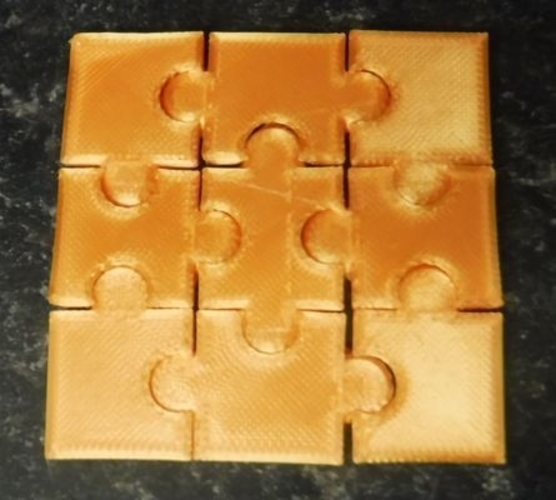
A simple 9 piece (3 x 3), interlocking jigsaw. Completed size 60 mm x 60 mm.
Multiple prints could be used to create larger jigsaws.
Why a jigsaw, something that was not too big would not take too long to print and had a practical use and had some intricacy.
I was looking at CAD packages and came across BlocksCAD and this appealed to me as it it was a coding based application rather than the usual technical drawing package. With a significant part of my life spent coding I was immediately drawn to give it a try. BlocksCAD runs in your browser but allows you to save files to your device.
If you are familiar with SCRATCH you should have no problem finding your way around although the end result is a 3D object(s).
So I had an idea of what to make and what I was going to use to realise the design and at the same time discover how to use the application.
The jigsaw pieces are made up from two 3D shapes these being Cube and Sphere.
In conjunction with Transforms; Rotate and Translate to position the shapes.
Using Set Ops, Difference, Union and Intersection to create the finalise the pieces.
There are four main jigsaw pieces.
1) Corner with tab and blank (4 required)
2) Edge1 with two tabs and one blank.(2 required)
3) Edge2 with two blanks and one tab.(2 required)
4) Centre with two blanks and two tabs.(1 required)
The shapes are coded in Modules enabling reuse of existing code to enabling flipping, rotation and duplication of these pieces to allow a complete 3 x 3 jigsaw to be realised.
Each piece is created using the Cube shape with dimensions of (L,W,H); 20 mm x 20 mm x 3 mm with the Sphere shape radius 5 mm used to create the blanks and tabs as required for each shape.
The dimensions being selected such that the pieces are both easy to handle and robust.
BlocksCAD unlike a technical drawing package which displays all your edits in real time, has to be rendered each time you wish to see the effects of your changes. There are 3 levels of rending Low, Medium & High.
Whilst working on this I would render using the Low setting for speed, as the number, size & complexity of the shapes increases so does the rendering time. Using the High setting repeatedly it would occasionally hang although the web page would generally recover where you left off, some time it did not, therefore suggest you save it regularly to be on the safe side.
I would therefore only use the High render setting for a final output, saving this as an XML for further editing and as an OBJ (ASCII) file for use in Ultimaker Cura.
Once in Cura you adjust the printing properties as required to suit your printer and your personal preferences.
As a guide printing time with Shell : 2 line count wall, Infill : 10%,Grid, Layer Height 0.2 mm, Speed 60 mm/s = ~1 hour, using 4 m of filament.
In this case the filament used was SUNLU Silk PLA Filament 1.75 mm, Silky Shiny.
Comments