Prints (0)
-
No Prints Yet
Be the first to upload a Print for this Design!
Description
While thinking about ways to help those who are visually impaired I thought that it would be useful to make a way to easily identify everyday items in and around the house, school and work.
Idea
My first idea was to take and develop a system to attach them to keys. This seemed really limited in it's usefulness, and thought being able to label multiple things would be more useful. By having a modular system, the end user could determine what labels are most useful for them.
Research
As with any idea, it's important to research the idea. There was some help found from the website http://diagramcenter.org/3d-pr... that was put on the contest page by Pinshape. While it was helpful to know that vertical prints were better for braille (most of the time), I wanted to find out more. I searched and found the English Braille American Edition 1994 (Revised 2002) from the Braille Authority of North America and used that to help me better understand spacings and various symbols and accents. I wanted to provide a learning tool with the modular braille system and found Unified English Braille for Math by Heather Harland and Cheryl Roberts that explained the various math symbols and how braille math is set up. I wanted to make sure to incorporate the things that I learned into the modular braille system.
Put it on Paper
After some very rough sketches (just look at the picture and you'd agree that it's rough) I went ahead and started designing in Illustrator. I've had years working in Illustrator, but am fairly new to 3D modeling for 3D printing and started where I felt the most comfortable. At first, I was going to only design single row labels and quickly realized that it was very limiting. In my next revision, I opened both sides of each tile to be used in creating the custom labels. UPDATED: I've updated the design to be the proper scale (so no scaling is needed to print these designs at the proper braille scale).
Print it Out (1st Iteration)
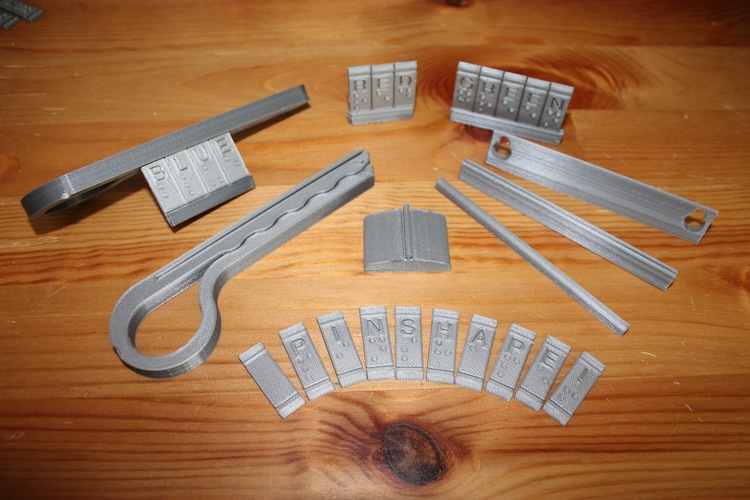
With the designs in hand, I created the models from my original designs. After creating models that were ready to print, I printed them out on my FolgerTech Prusa i3 Acrylic Frame. I printed in the only PLA filament that I owned (Translucent Green by IXCC). It worked well and the design proved doable (as seen in the photos and video), albeit it was a little difficult to resolve features with a translucent medium at this scale. When examining the print, I noticed that I was printing the tiles way thicker than they needed to be. With these first prints in hand, I began thinking about how to improve the design.
Print it Again (2nd Iteration)
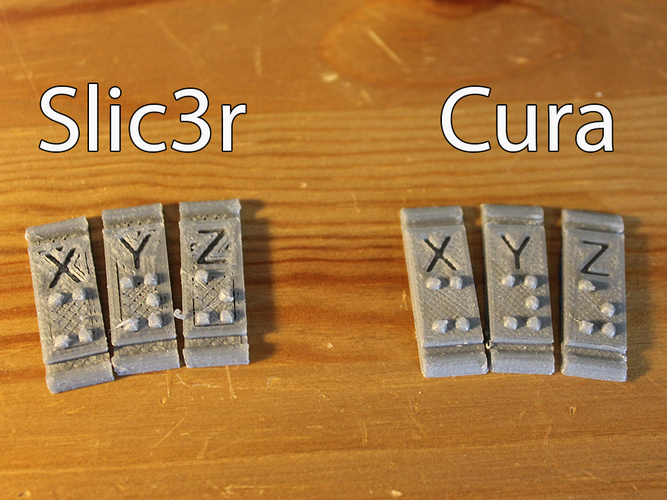
I thought about the fact that the tiles were way too thick to be very useful and that it also ate a lot of filament for a system that I wanted to be modular and would need a lot of letters printed. I decided to shave the tiles down in thickness and change the edge profiles where the tiles met the various mounts and holders. These changes allowed a cleaner profile and a lot less filament use. I had ordered some silver filament from 3D Solutech for the following prints as it was important to me to be able to resolve the details more clearly and see where I could improve. The first prints looked horrible. I couldn't figure out why. I kept working on changing various settings in Slic3r without much success. I then decided to switch to Cura for my slicing. The difference was amazing (see above photo). I printed the object at 100 microns with a print speed of 35 mm/s. My print bed was only at 35 degrees Celsius and everything printed well.
Turning 90 Degrees (Printing Vertically)
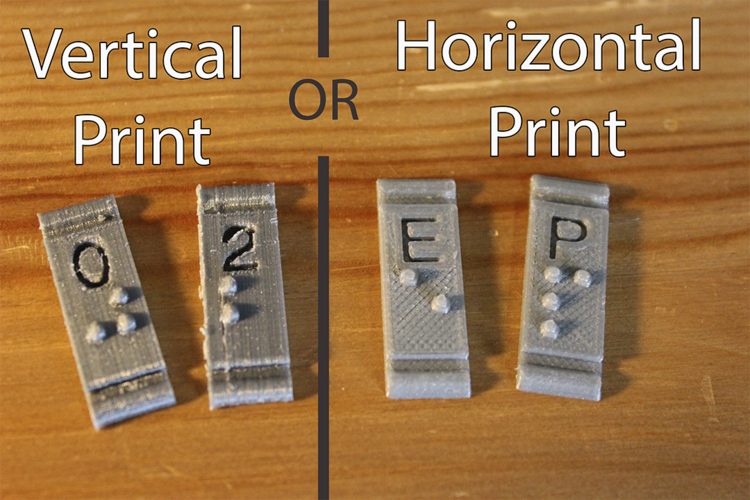
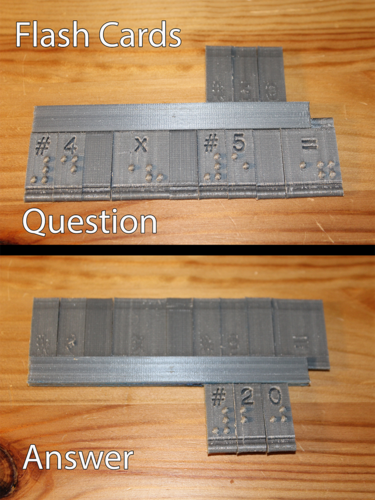
In order to make sure that the newly adjusted tiles would print vertically (in order to follow the suggestion of printing vertically for braille), I rotated all the tiles on their side and printed them with support material. The rods are designed to be printed without any support material. After the print was complete, I noticed the there was a lot of cleanup needed (partly from the supports in the letters) mostly from errors in my 3D printer (slight blobs on various layers on inside curves). I cleaned up the tiles (which in this case were math related tiles and used them to create the flash-cards. I thought that a modular system would be perfect for making flash cards for individuals or even classrooms. The same double-sided rod could also be used for adding new lines of text to the system. When I compared the horizontal and vertical prints, I didn't notice a significant difference in the quality of the braille dots, just a lot more post-processing of the vertical parts. This is probably due to the limitations of my printer and a more accurate/better tuned printer may do better. Thankfully, I was able to prove that the tiles in this system can be printed vertically or horizontally.
Final Result
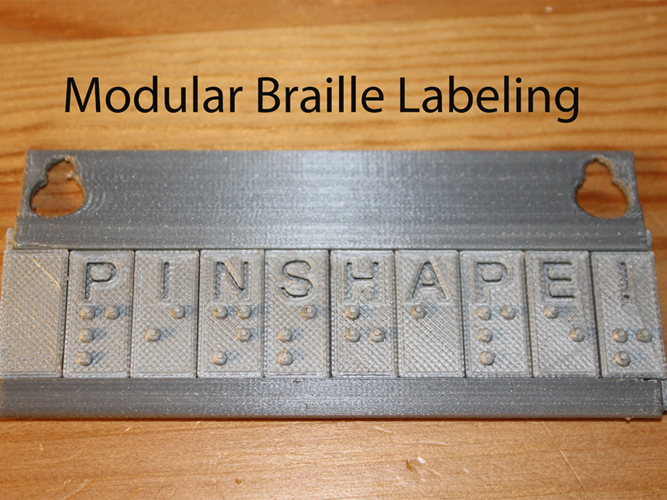
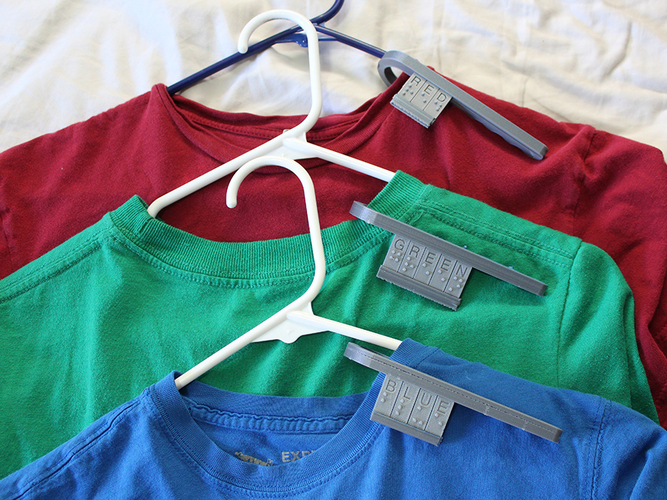
With this modular braille label and learning system, individuals, families, schools and workplaces have the ability to add braille where it's needed and how they need it. No glue is required to attach any of these pieces together, friction holds it in place and yet it's still easy to change the label. Name tags to go on cubicles, clips to differentiate articles of clothing, or clips to help distinguish between two different kinds of chips, no matter what it is, this system can really help. The alphanumeric symbols allow those who can see and don't know braille to understand the system or leaner braille for everyday objects if they know that they will become visually impaired.
As the video mentioned, there are profiles of the two rods, to allow anyone to make rods the length that they need. That link is here on Google Drive. These DXF files were created in Fusion 360.
If you have any questions about the system or have other ideas for it, I'd love to hear them!
Update: After showing my wife, she said that it would be smart to have a way to divide a closet (section it off). In order to make that idea a reality, I modeled a hook that attaches to a closet rod that can have tiles placed on either side, allowing one or two sections to be labeled from a single hook.
Update: Resized the files to be at 100% scale. Not the previous 150%.
Comments