Prints (0)
-
No Prints Yet
Be the first to upload a Print for this Design!
Description
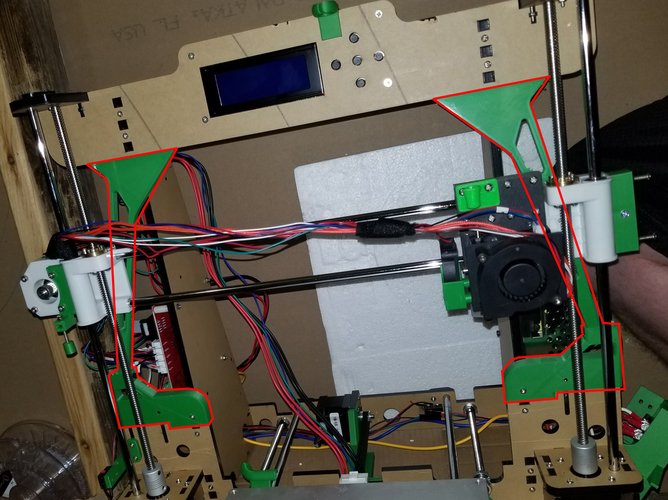
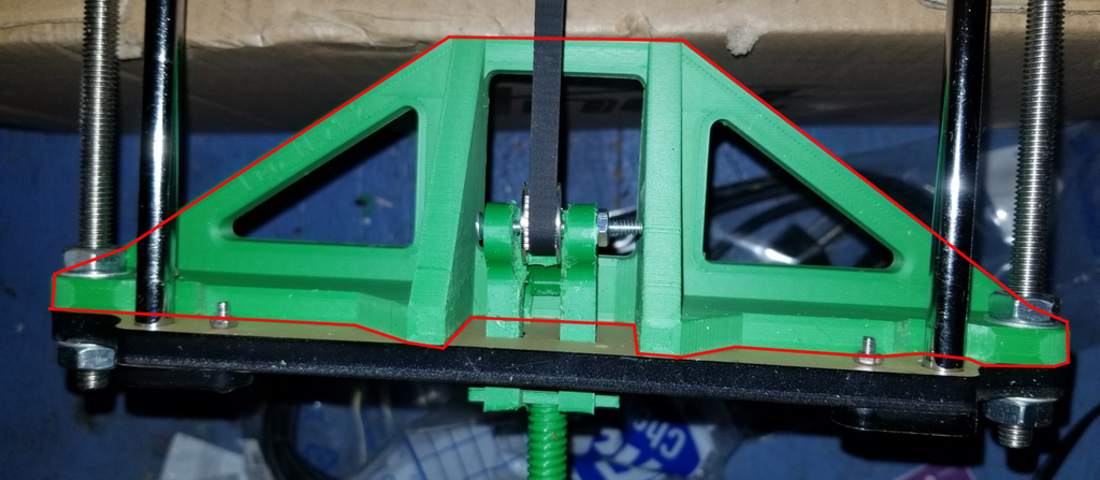
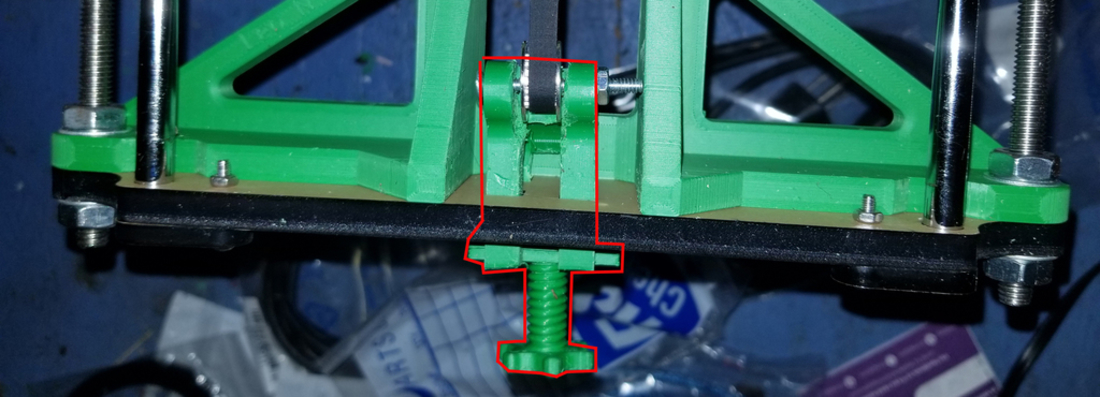
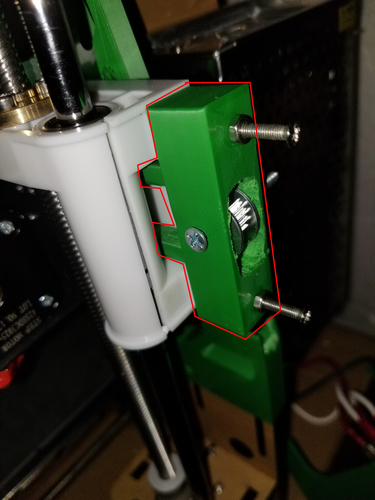
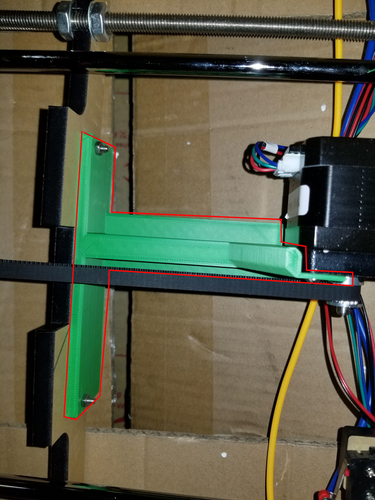
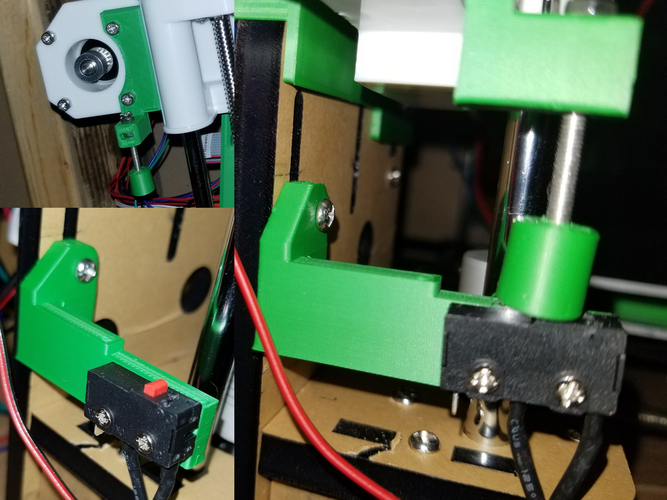
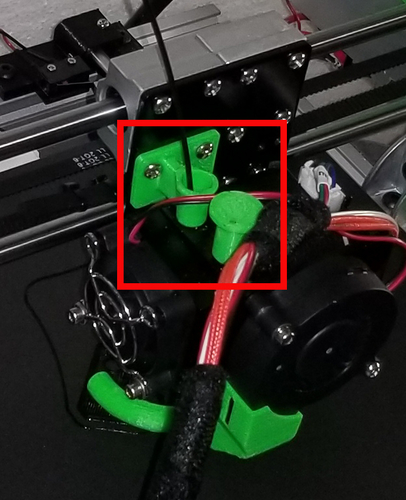
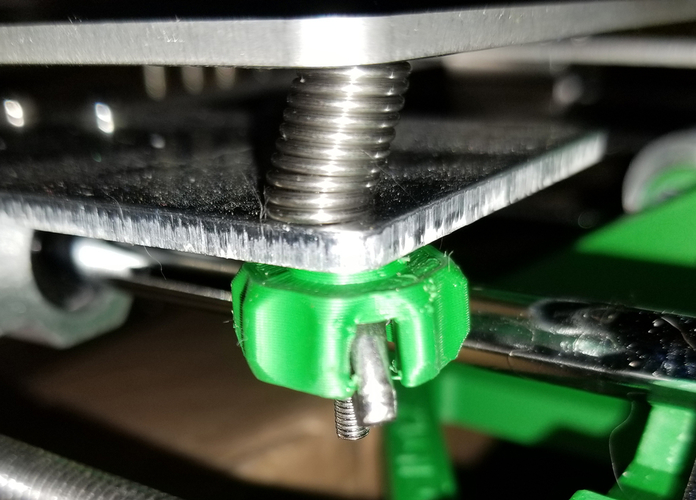
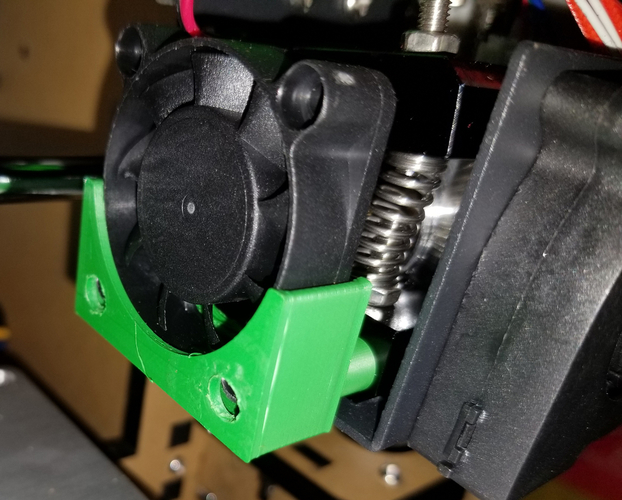
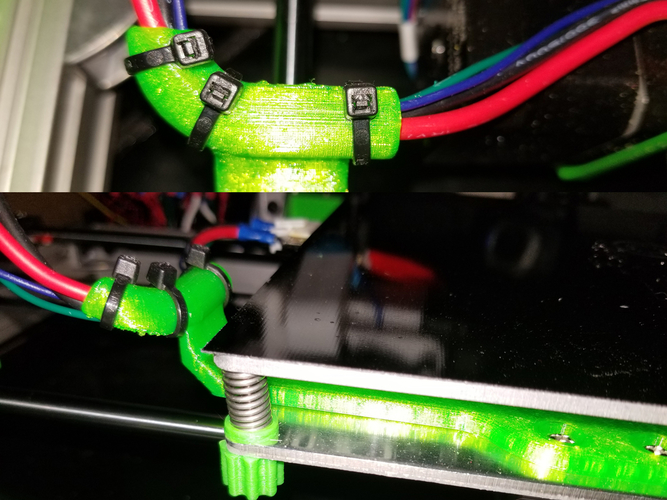
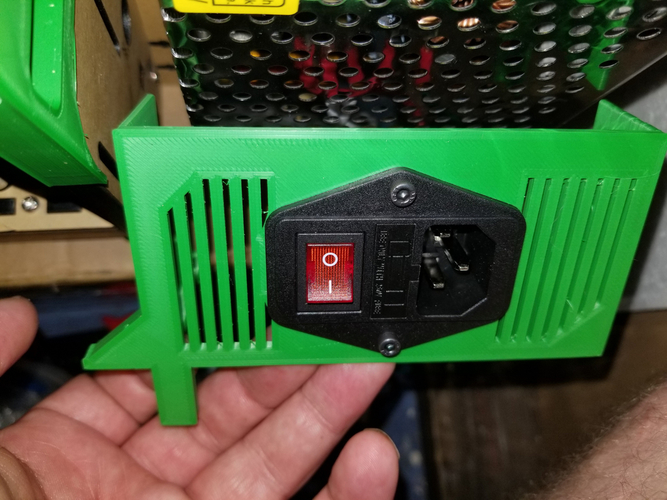
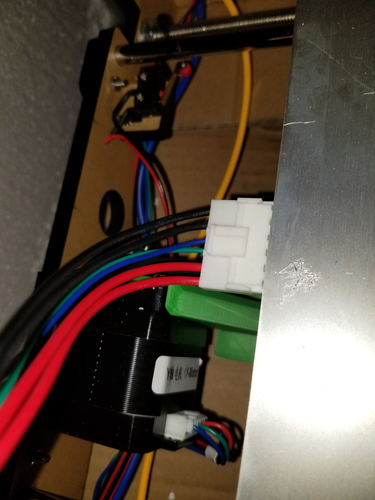
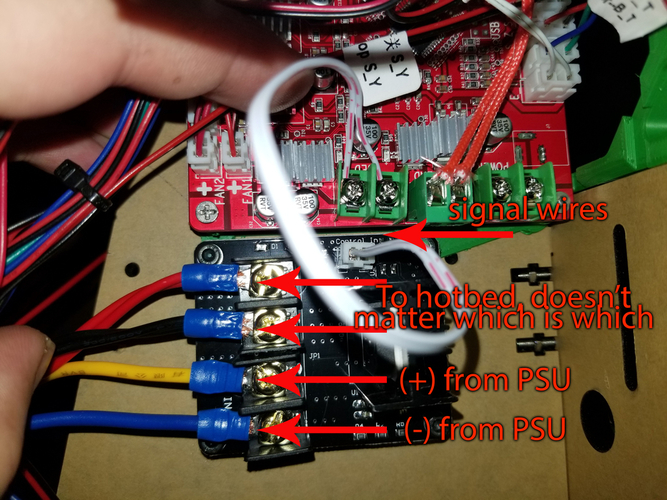
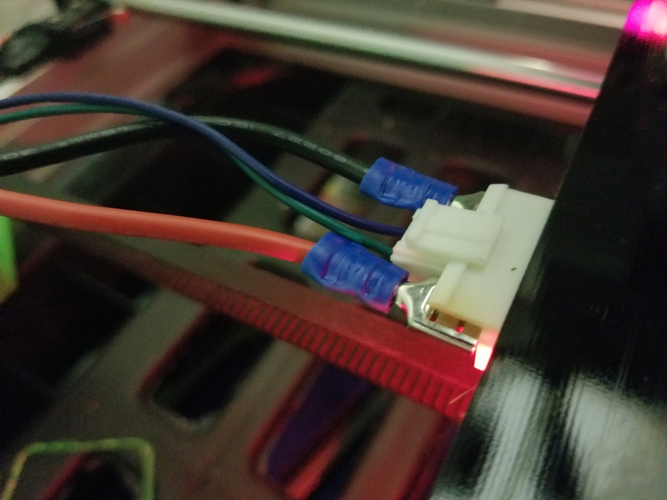
Summary In this guide, I'd like to show how I upgraded my 2nd Anet A8 with just minimal suggested upgrades that improve the safety and structural integrity of the printer with minimal costs. My first Anet A8 I went all out on, upgraded to a metal frame, BLTouch, E3Dv6 hotend, Titan Extruder, Bowden setup, fans... I turned a $130 printer into a $500 printer. But not everyone has the extra money to go all out, and I personally didn't want to spend a ton of money again on a 2nd printer kit. One day I'd love to have a top of the line printer, for now... Anet A8's get the job done. Every printable part I used in this guide can be found in the following collection:https://www.thingiverse.com/alieneila/collections/minimalist-a8 Purchased parts (under $60, keeping total cost of printer under $200) are linked to Amazon with my affiliate tag, however I have put the entire product name is it is show in Amazon so that you may search it yourself without using my links. Upgrade Firmwarehttp://marlinfw.org/ This is a must upgrade, not only does it add options to your printer that are not available with the stock firmware, it also adds thermal runaway protection, which will turn your hotbead or hotend off if their temperatures go whacky. Structural Integrity An Anet A8 comes with an acrylic frame, and it isn't the most reliable as it tends to wobble around while printing. But there are some easy upgrades that are all printable to improve the quality of your prints. Hulk Frame Bracehttps://www.thingiverse.com/thing:2189694 As seen in the above photo, the Hulk Frame Brace (outlined in red) adds braces that connect to the existing frame and applies pressure to the frame to restrict movement. Front Frame Bracehttps://www.thingiverse.com/thing:1857991 This brace not only helps to reduce Y axis wiggle, but it also gives strength to the front acrylic part when using a Y belt tensioner to help prevent breaking that piece of the frame or keep it from bowing inwards. Y Belt Tensionerhttps://www.thingiverse.com/thing:2149867 Having the ability to tighten your belts is very important to keep the belts from slipping or having extra play that will cause ghosting in your prints. This Y belt tensioner could using the stock idler pulley's, however I also purchased idler pullery's with teeth and upgraded belts. (see section below for purchased parts). In order to fit the toothed idler, I had to use my dremmel to widen the space for it to fit. X Belt Tensionerhttps://www.thingiverse.com/thing:1683070 See above above tightening belts. In order to fit the toothed idler, I had to use my dremmel to widen the space for it to fit on this one as well. Y Axis Frame Bracehttps://www.thingiverse.com/thing:2067872 Additional Y axis anti-wobble support. I did have to trim the top of the part that overlaps the Y axis motor because the lower part of the hotbed was hitting it. And that's it as far as reinforcing the frame. Make Life Easier Upgrades The following are just for making various things a little easier on the Anet A8. Adjustable Z Endstophttps://www.thingiverse.com/thing:2008349 An adjustable Z end stop makes things a bit easier for raising and lowering your nozzle, which you sometimes need to do based on the filament you're using. PLA for example tends to need squishing into the hotbed, whereas PETG can be raised up a little bit. Also, if you know your bed is already level after changing out a nozzle, this helps to place your nozzle at the right height without adjusting all 4 of your hotbed corners. Filament Guidehttps://www.thingiverse.com/thing:2373640 Extruder Buttonhttps://www.thingiverse.com/thing:1935151 Without a filament guide above your extruder, filament tends to rub against the metal hole and it gets scraped, leaving plastic dust to fall into your extruder. The button just goes over the existing metal button that releases the tension on your filament gears in order to feed your filament through or take it out. The button helps in comfort as the metal button can dig into your thumb/finger. Wing Nut Bed Leveling Knobhttps://www.thingiverse.com/thing:2000216 These really help to turn the wingnuts when you need to level your bed. Easy Remove Extruder Cooling Fanhttps://www.thingiverse.com/thing:2326111 As long as your fan is blowing directly into the extruder to cool the heat break, you don't really need the heatsink between the fan and extruder. This little shelf thing holds your fan in a way that you can quickly and easily remove the fan in order to access the inside parts of the extruder. This is helpful for cleaning it out and guiding your filament into the heatbreak. Safety Upgrades Most of the following upgrades are purchased, while it does add cost to the printer, these upgrades are well worth it to help prevent your printer from catching fire and burning down your home or office. There are three printed parts, one is stand alone and two goes along with purchased parts. Heatbed Cable Holderhttps://www.thingiverse.com/thing:1875869 This is pretty much a must. When your hotbed moves back and forth on the Y axis, the connector that holds the wires to the hotbed wiggle. This eventually causes the connector to catch fire. This wire holder takes the tension and movement out of the connector and out of the box this should be a good solution. Though I also suggest doing 1 of a few different things that also will make the connector safer. 1) I do not use this option, but some suggest to solder the wires directly to the bed. I personally do not like this option as it makes maintenance more difficult. 2) Another option that I don't use is to switch out the connector, and possibly combine with option 1 so that the wires are soldered, but then you have a connector further down the wires in order to disconnect the wires. Two Options I DO use: 3) Cut off part of the connector, cut the wires for the positive and negative and add crimp connectors. This allows for a more secure fitting as well as passing current to both of the connectors that should be used by the positive and negative wires. You leave the center portion of the connector intact so that the thermistor signal wires still connect as normal. The final option I do use, is to add 2 wires to the connector so that the current a) is split between 2 wires each on the positive and negative, and b) uses both connectors for each set of wires, this means you have 6 wires going to the hotbed. I had planned on doing it this way, but surprisingly enough my 2nd Anet A8 actually already came with the 6 wires connected. No matter which option you use, be sure to still also use the wire holder to remove any movement of wires at the hotbed. Mosfet Holderhttps://www.thingiverse.com/thing:2018906 I highly suggest as an added safety measure to add a mosfet to at least control the hotbed. The mosfets I bought came as a pair and came with all of the wires, crimp connectors and instructions on how to connect it. (mosfet I use is below in purchased parts section). It is super easy to setup and takes current out of the motherboard, which has been known to cause the motherboard to fail. Power Switch Holderhttps://www.thingiverse.com/thing:2000523 It boggles my mind that the Anet A8 doesn't come with a power switch, but this is a cheap and easy way to add one that is also fused, so you get an on/off switch and added safety. The power switch I use is different than the one that is linked to in the desription for the switch holder, but it fits perfectly and comes with a fuse as well. (see below in purchased parts list) Purchased Parts -Mosfet: https://amzn.to/2HXhCYO Heat Bed Power Module SIMPZIA Add-on Hot Bed Power Expansion Board MOS Tube High Current Load Module for 3D Printer -Power Switch: https://amzn.to/2qUxVyw URBEST Inlet Module Plug 5A Fuse Switch Male Power Socket 10A 250V 3 Pin IEC320 C14 -Power Cable: https://amzn.to/2qV17Fo C2G/Cables to Go 03134 18 AWG Universal Power Cord (NEMA 5-15P to IEC320C13) Black, TAA Compliant (1
Comments