Prints (0)
-
No Prints Yet
Be the first to upload a Print for this Design!
Description
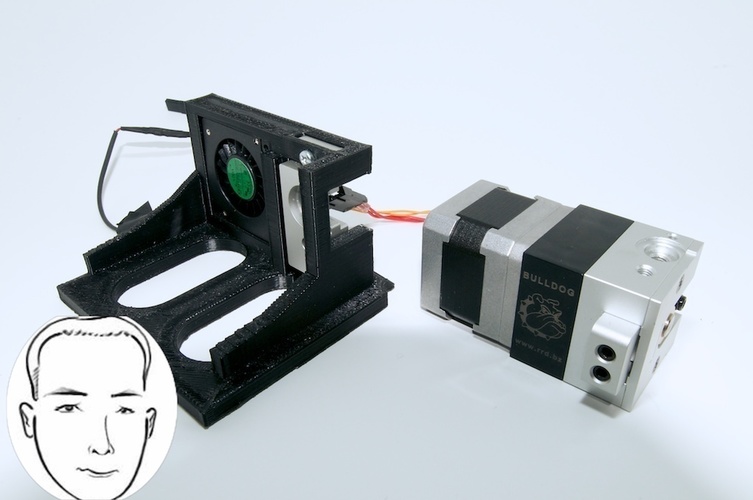
SummaryUPDATE 11/26/15 : ADDED TAZ_BULLDOG_MOUNT_VER_2.stl. and TAZ_BULLDOG_FAN_MOUNT.stl. This is an update to the original design. The following has been added to Version 2. 1) Fan wire hole added to the right side. 2) Added screw mount holes for fan on front. I use this duct fan mounting arm: http://www.thingiverse.com/thing:540716 and this additional attachment TAZ_BULLDOG_FAN_MOUNT.stl. 3) Widened the area where the hot end fits to accommodate D3r hot ends. 4) Added round ends to lessen warpage. These are to be removed prior to used. Enable and simplify your Lulzbot TAZ printing with the Bulldog all metal extruder. This print is very straight forward and installation is easy. This extruder, when using the AO Hex hot end, is about 10 grams less than the current TAZ extruder. The Bulldog comes with a pretty nifty hot end cooling fan assembly. There were clearance issues and unfortunately I could not find a way to get it to work well, so that is why I have created this model which embeds the fan into the mount itself. Im currently tweaking this model but this version works fine. See change/problem list below. See the Jude Labs construction video on Youtube: https://youtu.be/MeO4IKU9B64 Current Update List for version 1 (removed from Thingiverse): 1) Add fan wire hole 2) Add screw mount holes for fan (version one still works without) 3) Make Prettier 4) When using the AO Hexagon hotend, the Z axis of the mount assembly is very low and the ZStop has to be very very low. Also there could be interference between the mount assembly and the heated bed mounts. Working on a way to extend the hot end length to the normal TAZ height. 5) Center to the Nozzle so that no configurations changes need to be made between this Extruder mount and the TAZ extruder mount. When using the Bulldog mount, the nozzle is off the bed slightly on the left X axis. InstructionsYOUTUBE Walkthrough: https://youtu.be/MeO4IKU9B64 New Settings: With this extruder you will need to reset your Estep to 500. Print Settings: Material: ABS Nozzle: .5mm Layer Height: .4mm TAZ to Bulldog Wiring: There is a bit of confusion on the wiring since the Bulldog stepper uses a different wiring schema than what comes with a TAZ stepper. The Bulldog that I got had no instructions at all. BULLDOG TAZ RED A+ RED PURPLE A- BLUE BLUE B+ GREEN YELLOW B- BLACK
Comments