
Prints (0)
-
No Prints Yet
Be the first to upload a Print for this Design!
Description
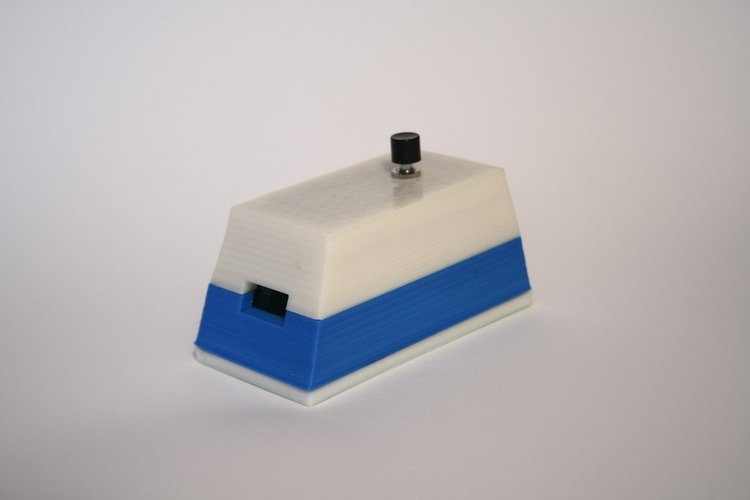
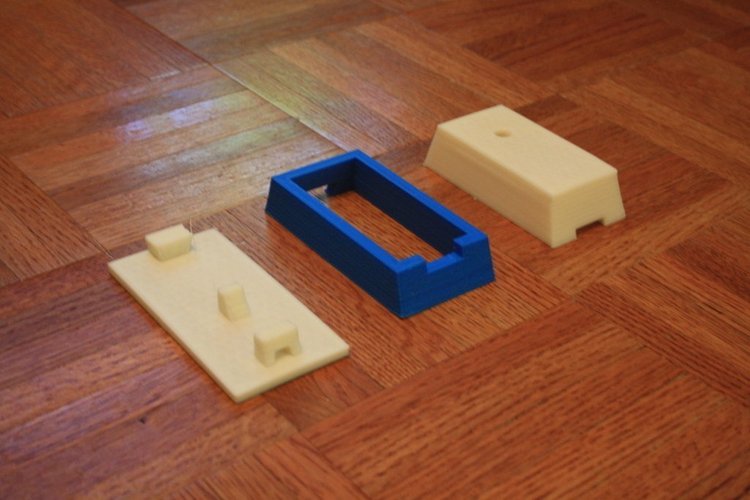
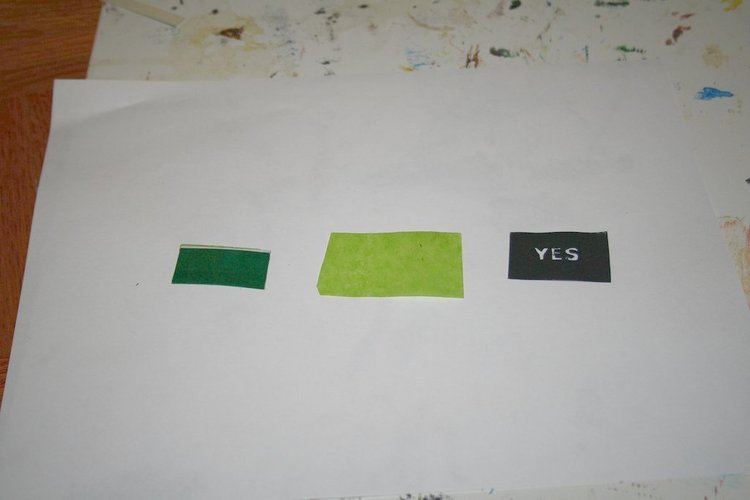
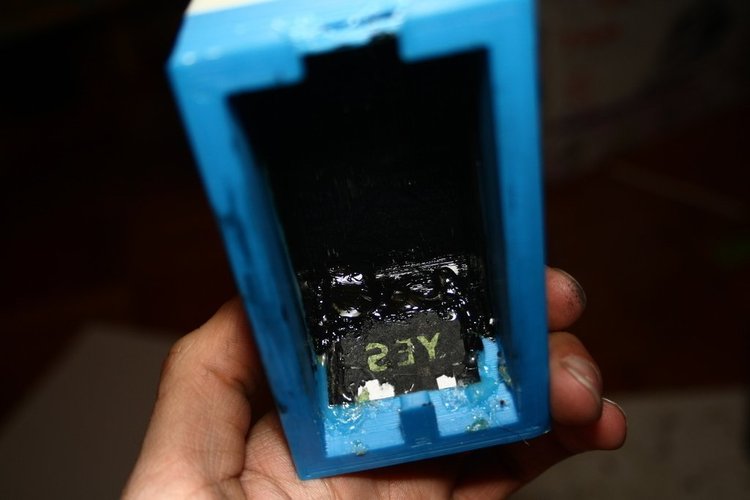
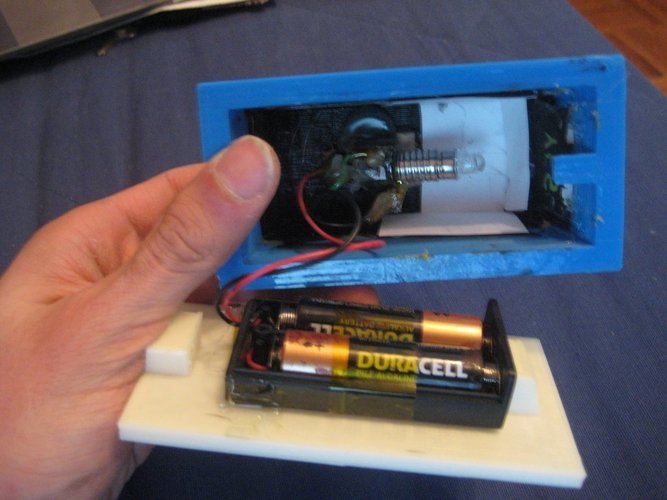
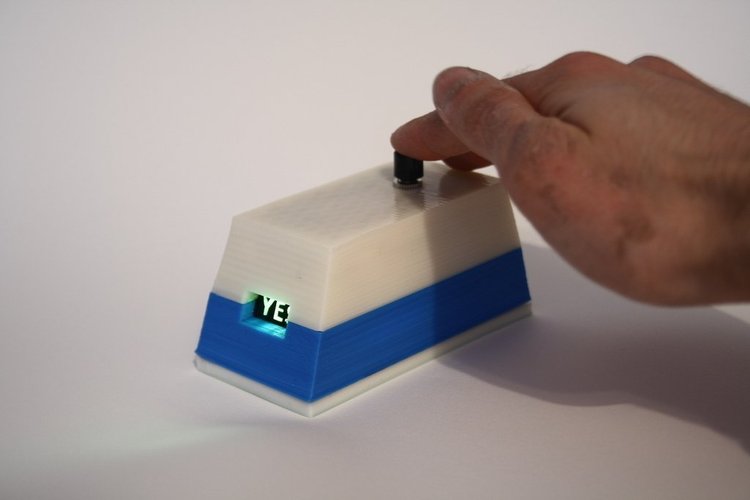
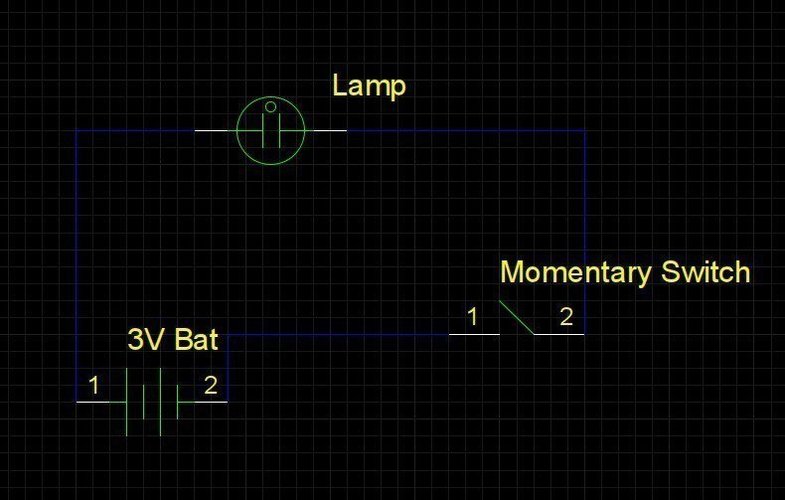
Summary The Automatic Affirmation Device only has one thing to say: YES. Will today be a good day? Will I pass that exam? Is this the best idea I ever had ever? YES. The Automatic Affirmation Device is your own personal confidence booster that is never wrong. This is designed to be a gift, the perfect gift, (for you to give) to someone who is in need of some caring reassurance. Instructions The Box itself Print out all three sections of the box: -The Base (Base-Battery-slider.stl) -The Lower Section of the Box (Lower-section.stl) -The Top Section of the Box (Top-section.stl) Attach the top and bottom sections of the box to each-other. Be sure to carefully align the sections so that the front face (where YES is displayed) has a clean seam. I affixed the two sections together using ABS glue, but I imagine Hot Glue would also work. The YES Screen When the interior light is activated this is the 'screen' on which 'YES' will be displayed. As shown in The YES Screen Components image http://www.thingiverse.com/image:47017 there are three basic elements you will need to make/find: -A small piece of paper with the word yes cut out of it. Once cut, I painted mine with acrylic paint so that it would not let as much light through the paper. (I included a YES graphic in the list of images for this thing, but i don't know if that is actually making things easier for you...it's not hard to design yours better than mine and the size of 'YES' will vary with the box size) -A small piece of tissue paper. Yellow or Green will work well. -A green coloured piece of plastic (You could use coloured acetate, for mine I printed out a green rectangle onto an overhead projector sheet). the outer size of these sheets should be about 46mm x 23mm, but that will vary depending on the size you printed your box (just make it small enough to fit inside of your box, but large enough to have something to glue on to the box interior). The word YES should be small enough be visible through the tiny window on the front of the box. Using a glue stick, or some rubber cement, affix the tissue paper to one side of your green coloured piece of plastic. With the plastic side of the screen facing downward, affix your paper with 'YES' cut out onto the tissue paper side of the screen. when glueing down the 'YES' paper, the word should appear backwards as seen in the image of the box's interior http://www.thingiverse.com/image:47018 You can now glue the 'YES' screen on to the interior of the box as seen in the previous image. Note that plastic side of the screen is facing the outside of the box. Note that I painted the interior of the box with acrylic paint to prevent light from escaping. The Electronics The electronics are very simple, and are wired as follows: With some copper wire connect one lead of the battery to one pole of the bulb holder. Connect the other lead of the battery to one pole of the momentary switch (note: depending on the type of switch you purchased you may have to attach these wires after the switch is mounted in the box...which is tricky, but doable). Connect the remaining poles of the of the lamp and momentary switch to eachother. Sidenote: As a simple as the electronics are I am sorry if I completely failed to properly articulate the steps. Also, I am sorry if I insulted your intelligence by trying to carefully explain what is a pretty bare bones circuit. As an exercise for myself I attached a schematic image onto this thing...I understand that schematics are easy for most people to read...but they always pose a difficulty for me. The extremely simple schematic I attached is the first one I have made that is not a collection of arrows and squiggly lines, handwritten on a piece of crumpled paper, that I eventually misplace. Finish it up Once your switch is mounted into the box, and the battery compartment is hot glued on to the Base Battery Slider, and the 'YES' screen is glued onto the interior of the box, you are pretty close to being done! You just have to mount the light in place. My way is not the best way, this is what I did: I glued a small dowel on to the interior top of the box, and used that to pivot/position the beam of the light, which was then hot glued into place. It was a little finicky, and maybe your derivitave will include a light mounting thing in the top-section.stl ;) In my own box I meant to use AAA instead of AA batteries, but I only had one size of battery holder on hand (You will find that I often trade a patient solution with a quick solution, for better or worse). With the smaller batteries you will likely have more options for light mounting and battery positioning. Also, I only had a prefocused light on hand, which isn't the best in this situation. To increase the spread of the light I put a dab of hot glue on the lights tip (you will also find that I solve ALOT of problems with hot glue) to properly diffuse the light. Also note that the battery compartment is glued close to the front of the Base Battery Slider: http://www.thingiverse.com/image:47019 AND THERE YOU HAVE IT! YOUR AUTOMATIC AFFIRMATION DEVICE IS BORN Operation Ask the device a question that you need to be positively reassured about. 2.Press the momentary switch on the top of the device. It will only tell you the truth. Presentation When you give these devices as gifts to your friends and family it is important that you believe in them. You absolutely need to take on the role of artist/magician/TV Infomercia
Comments