
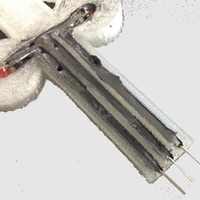


SummaryI wanted to create a 3D printed circuit using conductive ink similar to a Voxel 8 3D printer but on the cheap. I found some conductive glue at Radio Shack and used it to make a 3D Printed Train Crossing Circuit powered by an Arduino. The circuit just flashes LEDs back and forth like a train crossing and a key part of the circuitry is conductive ink placed in channels in a custom 3D print.
You can see more details at my YouTube Channel:
I used this conductive glue from Radio Shack:
SettingsPrinter: MakerfrontRafts: NoSupports: NoResolution: 0.3Infill: 25%Notes: You can use any fill or resolution. I used clear filament to make it easier to see the conductive ink.Post-PrintingJust add the conductive glue/ink to the channels to make the circuitry connections.How I Designed ThisI designed the traffic light with channels in Tinkercad
Loading prints...
3D Printed Conductive Circuit - Train Crossing
3
likes
0
collections
Tags:

Creative Commons Attribution-NonCommercial-ShareAlike
You can distribute, remix, adapt, and build upon the material in any medium or format for noncommercial purposes only, with attribution and under the same license.
 Licensed under CC BY-NC-SA
Files Included
1 downloadable file:
Free download - login required
Downloaded: 37 times
Downloaded: 37 times



Loading comments...