How to generate a 3D printable mold for an object!
We were lucky enough to have Dan Steele write a post on generating a 3D printed mold for an object! He has done quite a few of these, and you can download his molds from Pinshape. But if you want to create your own, read on for Dan’s tutorial!
Introduction
I’m going to walk through the process of taking a cool character model and turning it into a mold, then casting copies from the mold.
Making a 3D printed mold can be a very easy process for some models. For instance, Robber Rex was already Manifold, had no internal structures, and was low-poly so it took about 2 minutes to generate a mold with the reference script. You can find the mold I created for it here.
You can find the script that I ran against the original model with the parameters I used already filled in here.
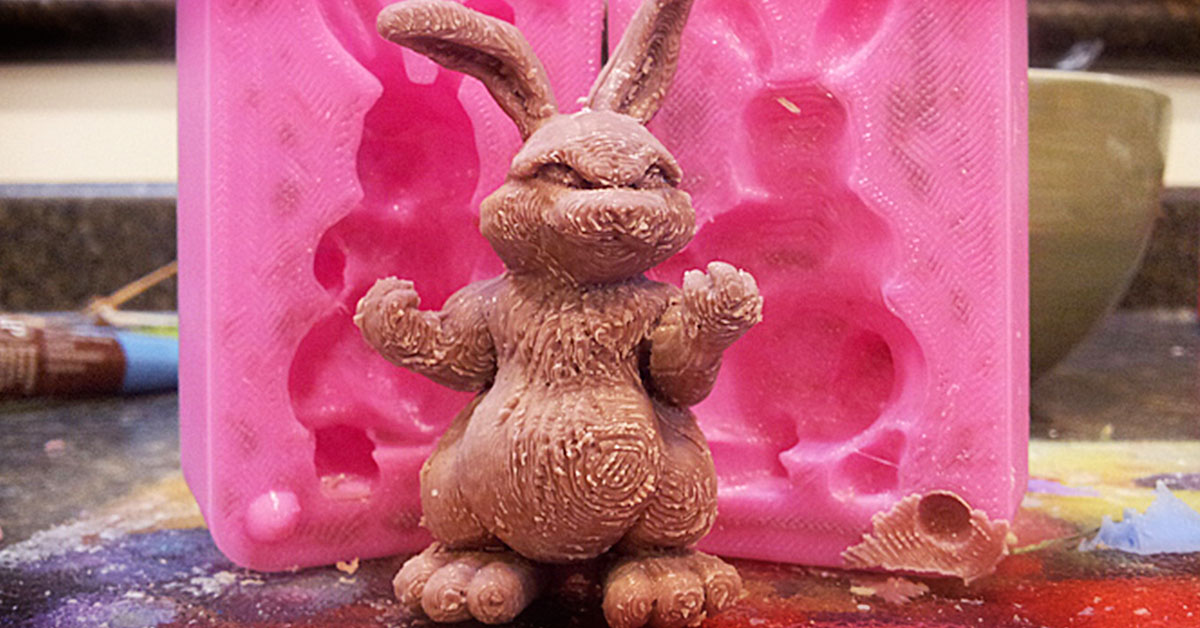
Bunny with an attitude was quite a bit more work. This cool model was designed by Tanya Wiesner.
This tutorial documents how I turned this model into a mold. The exact same steps should be able to convert all but the most broken models into molds.
Making a mold and casting can be broken into three distinct parts:
- Prepping and cleaning up the model
- Making the mold
- Casting parts
Preparing and cleaning up your model
The three requirements for a model capable of generating a mold are:
- Manifoldness – A model must be manifold in order to turn it into a mold. For a model to be manifold, it must make up a volume that could exist in the real world. The most common cause of non-manifoldness are “holes” in a mesh. If the mesh isn’t “water tight” and there is no clear inside and outside volume, a model is not manifold.
- No internal structures – Often when models are created, they are made by jamming multiple other models together. If these models aren’t stitched together properly with their internal structures removed, then we need to fix this before we attempt to make the mold.
- Low-Poly – To use OpenSCAD to create a model, the poly count on the model must be less than 20,000. While this number may sound low for most objects, a higher poly count doesn’t get you any more detail anyway.
Step 1 – Reducing the polycount
Use Meshlab for this process. It’s free and can be found here. Meshlab is a full-featured tool but I mostly use it for reducing polycounts. Start Meshlab up and load your STL by clicking on File->Import Mesh… Next take a look at the face count. It’s circled in red in the above picture. Right now it’s at almost 1 million. I want to reduce it down to well under 100K for the first part of our process.
 Click on:
Filters->Remeshing, Simplification, and Reconstruction->Quadratic Edge Collapse Decimation
Set the number of faces to something that still looks reasonable when you hit “Apply” but is below 100K (I chose 60K). Hit “Apply”.
Your Model is now decimated down to a workable number of faces. If you skip this step, some of the software used in later steps won’t load the model, or will crash when you try.
Step 2. Is it manifold?
Now we need to verify our model’s manifoldness. Quadratic Edge Decimation generally produces good-looking results but frequently breaks manifoldness. The attitude bunny I’m using was manifold before the decimation, but now is not. Here’s how you tell:
Click Render->Show Non-Manif Edges
then
Click Render->Show Non-Manif Vertices
 Notice in the above example we now have 60,000 faces in the bottom center. Also up in the top left hand corner we also have two boxes that should have a total of 4 zeros if everything is manifold. But I have a 1 and a 4. To fix this click:
Filter->Cleaning and Repairing-> Remove Duplicate Faces
Filter->Cleaning and Repairing-> Remove Duplicate Vertex
Filter->Cleaning and Repairing-> Remove Faces from Non Manif Edges
Once that’s done export your mesh as an STL even if it still isn’t perfectly manifold.
If after selecting all of the above your model still isn’t manifold, you’ll have to load it in Netfabb Basic (also free) and attempt automatic repair from there.
If Netfabb basic won’t fix it you may need to reduce the polycount further and repair it by hand in Sketchup. This is tedious and not for the faint of heart.
Speaking of Sketchup, it’s a great tool for taking a look inside our mesh to see how the insides look. It’s free and you can download it here.
You’ll need to install an STL importer/exporter. There’s one available in the Sketchup plugin library. Once you’ve done that, you’ll be able to import your model and have a look. I highlighted the back of my model, then right-clicked and selected hide. Here’s a peek at the insides: If you look carefully you’ll notice two things: the spheres up in the head structure and the overlap in the legs. These internal structures need to be eliminated to make the model properly manifold.
Step 3. Get rid of internal structures
This used to be a long and tedious process but now there’s an easy and free solution. Autodesk’s Meshmixer tool is free and can take care of this for us. Download it here.
Load Meshmixer and choose import to import the latest version of your mold.

Click Edit->Make Solid
You’ll need to make some adjustments here to make things come out right. Adjust the values of “Solid Accuracy” and “Mesh Density” upwards until your model looks nice and clean when you hit “Update”. Once you’re happy with the results hit “Accept”. Now go to File->Export and export it as an STL. This will produce an amazingly large file (mine was 1.9GB and a couple million polys). You’ll need to bring this back into MeshLab and decimate it down to less than 20,000 polys (I used 11,000). Follow the steps above to clean up any final manifold errors.
Your model is now ready to be turned into a mold! ☺
Making the mold
For the next part you’ll need to download OpenSCAD. It is another free modeling tool and you can find it here.
You’ll also need my mold generation scad which can be found here.
Put the Mold Generator script in the same directory as your model and load the script in OpenSCAD. The code window will look something like this:

You’ll need to change model_filename to the name of your STL. You can hit F5 to render a view of what the script will do right now. If you are very lucky it will be perfect right away, but chances are it won’t be. Note that this script creates a negative of your model and pushes it into two halves of your mold. A negative space is difficult to see and position so there is a small change you can make to the script to see the model you are trying to place in the mold halves.
 Notice the six ‘//’ I added on the left-hand side. Add those and hit F5 and all of a sudden you will see your model in the preview. You can now move the model around and put it halfway into the right-hand side of your mold. You move your model around by tweaking these variables

For model_rotate and model_translate the 3 variables are X, Y, and Z respectively. model_scale is a multiplier applied to the size of your original model.
Adjust the mold_width, height and depth as needed so that your model sits nicely in the middle of your mold. Don’t forget to hit F5 after you make an adjustment to see the effect. When you have all the variables set right, your preview should look something like this:

Once it looks right, you’ll need to remove the 6 ‘//’ comment markings we added above and hit F5 again. It should now look like this:

Your last step is to do a full render and export the STL. To do a render hit F6. This will take much longer than when you hit F5. Once the render is done, the model in the preview will look much clearer:

You can now select File->Export and Export as an STL.
Casting with Oogoo
The original instructions for making Oogoo can be found here.
I’ve got a couple of tips for using Oogoo so that it will work well with these molds.
- Add essential oils. Just add a few drops of vanilla (or whatever other odour strikes your fancy) essential oil to the silicon before adding the corn starch . It will replace the yucky vinegar smell much quicker.
- Add a bit of oil-based paint even if you don’t care about color. The extra oil from the paint and essential oil makes the Oogoo a bit thinner and delays the curing process a bit.
Here are my steps to making the mold:
- Add the essential oils into the silicon and stir in the paint
- Stir until paint is mixed evenly
- Mix in corn starch. Add the same amount of cornstarch as silicon by volume. I did this one teaspoon at a time, stirring until it was well blended.
- Smoosh the Oogoo into the mold. Add more than you think you’d need.
- Squeeze the mold halves together as tightly as you can. Oogoo should push out from all four sides if you’ve added enough. The harder you squeeze and clamp the halves, the less flashing you’ll have to clean up later.
Leave your mess sitting around on the counter so you can poke at the leftover Oogoo every once in a while. When it’s hard and rubbery, the stuff in your mold will be as well. Pull the mold apart carefully and enjoy your new minion. Make a thousand. Start an army….take over the world!
We’d love to hear from you!
Questions? Comments? Leave them for Dan below!


