3 Top Tips To Design For 3D Printing
Looking to start designing for 3D printing? To help you optimize your models for 3D printing, this guide will go over design tips from some of Pinshape’s top designers. You’ll learn how to minimize support structures, create models that print efficiently, and repair any issues in your designs. Let’s get started with reducing support structures in your design.
Minimizing Support Structures
Most common 3D printers can comfortably print overhangs at angles up to 45 degrees. For angles above 45 degrees, you will start to experience a dropping effect. This is because your material doesn’t have anything below it to build on and significant layer cooling is required.
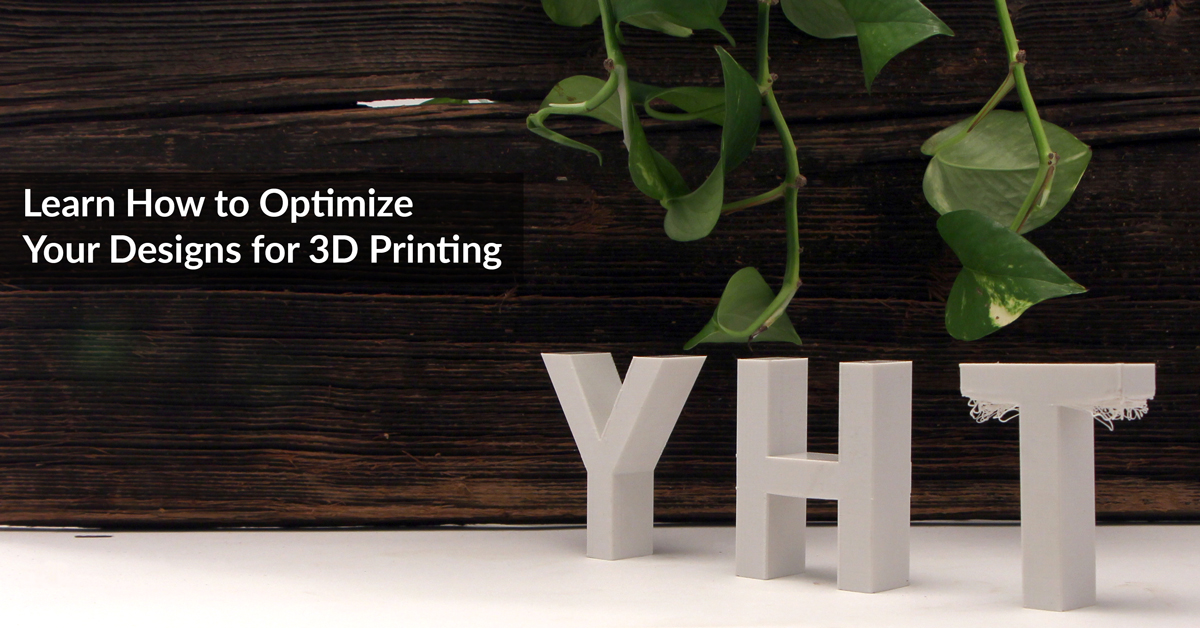
The “YHT” rule is a great way for visualizing what sorts of features will successfully print. The letter “Y” has a comfortable angle of around 30 degrees and can be printed on most machines. The letter “H” has a relatively short unsupported regions that can be bridged depending on your printer and material. The letter “T” has two fully unsupported sections and will fail on most printers.

To print something like the letter “T” successfully, support structures are required. Support structures are generated by your slicer program and used to support regions of your model that are either too steep or entirely unsupported. Different slicers have different methods for generating supports but they typically use a linear pattern that is removed from the model afterwards. Support structures do use more material and can diminish the surface finish of your design so you’ll want to minimize them as much as you can.
Checkout Pinshape Designer Fantasygraph’s post where he goes into greater depth on reducing the number of supports in your design. He’s learned to create functional supports that are a part of the model itself. With his method, you can avoid wasting support material that you throw away.
Minimum Features and Tolerances
Most 3D Printers use nozzles with a diameter of around 0.4mm. Because filament expands somewhat after being extruded, the effective size of the extruded filament is around 1.2 times the nozzle diameter or 0.48mm. This means that most FDM printers have an absolute minimum feature size of around 0.48mm. This can change depending on the diameter of your nozzle so to calculate your specific minimum feature size, multiply the diameter of your nozzle by 1.2.
 Test your printer with this model
Tolerances for our purposes refer to the distance between two objects before they fuse together. This is a bit more tricky to determine as it will vary between printers depending on the quality of your machine. Sonia Verdu created an excellent design for establishing your machine’s tolerances. She’s found that a minimum tolerance of around 0.7mm is optimal for surfaces that you want to keep separate, but you can use her model to test this for yourself. For more information on minimum features and tolerances, check out this blog by Sonia Verdu where she teaches you how to create articulated models for 3D printing.
 Articulated small kitten and dinosaur by Sonia Verdu
Repairing 3D Models
Running into errors with your design is an inevitable part of 3D Printing. We’ll be going over some of most popular methods for repairing your models. For more detail on how to fix your models, check out this tutorial by 3D design professor, Edditive.
Surface Holes
Imagine your design to be hollow and filled with water. An error free mesh will not provide any holes for the water to escape. A mesh that does provide holes for water to escape is not considered watertight and will cause errors in most 3D slicer programs.

Floating Geometry
This is a common issue in 3D scanning where artifacts are picked up by the scanner and seem to float in space. Oftentimes, this will take the form of rogue triangles or floating and unintended geometry. Fortunately, many 3D design programs have tools for selecting and deleting orphaned triangles and geometry.

Intersecting Surfaces
Oftentimes, it’s easiest to make a model by intersecting several different shapes. Unfortunately, this will cause errors in many 3D slicers. 3D models are meant to be one continuous array of polygons and intersecting surfaces tend to break that convention. The easiest way to fix a model with intersecting surfaces is to use Microsoft’s 3D Model Repair Service. This is great for fixing a number of common STL issues and in the case of multiple intersecting surfaces, will merge everything into one.
By following these tips, you’ll be well on your way to creating models that can be printed easily and reliably. We’re looking forward to seeing your designs on Pinshape!
Interested in creating intricate designs for SLA printers? Check out this design guide by Formlabs.
![]()


